If you have ever been asked to hand over a photocopy of your Aadhaar card while checking into a hotel or accessing a service, you know the discomfort that follows. Most people either argue or reluctantly comply—despite UIDAI repeatedly warning citizens not to share photocopies of their Aadhaar. Now, the government is aiming to end this problematic practice altogether.
UIDAI has introduced a revamped Aadhaar app for both Android and iPhone, bringing a new feature called “Aadhaar Offline Verification”. This feature aims to eliminate the need for photocopies and shift the entire process toward a more secure, controlled, and Privacy-focused method of identity confirmation.
The updated app—launched on December 1—marks a major shift from the older mAadhaar app, which was focused mainly on online services. The new Aadhaar app prioritizes offline authentication and is designed to minimize how much personal data individuals must reveal during routine checks.
However, for this system to work, hotels, organizations, shops, and other entities must first register with UIDAI. While the feature is active for users right away, its adoption in daily life will grow gradually as more entities register themselves.
To push adoption, UIDAI has already issued a regulation requiring businesses to formally register with the government before they can use offline Aadhaar verification for customer identity checks.
Before exploring how this feature could impact your daily life, here’s a quick overview of how Aadhaar offline verification works on the new app.
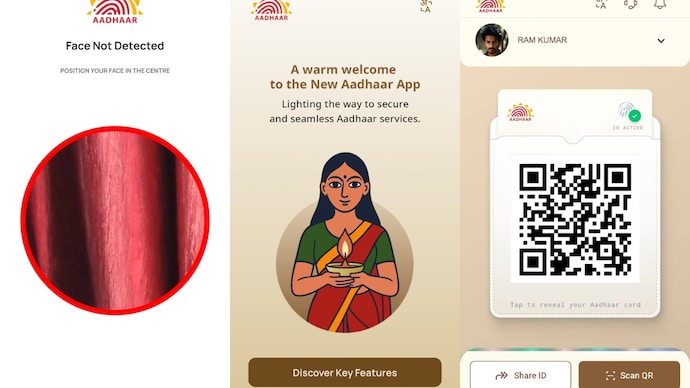
After installing the app, users see two main options:
1. Share ID
2. Scan QR Code
Both methods support offline verification. With the Share ID feature, users can choose what information they wish to disclose—either full Aadhaar details or selected fields like name and age. The shared file is password-protected, and the user controls what is sent.
The second option—scanning a QR code—is expected to become the primary method. Registered entities such as hotels or restaurants may have a special UIDAI-approved QR-scanning device. Much like scanning a UPI QR code, you simply scan the code offline, and your Aadhaar details are securely verified without internet dependence.
How Aadhaar Offline Verification May Impact Your Daily Life
The effectiveness of Aadhaar offline verification will only become clear over time. But as a concept, it presents both benefits and concerns—depending on how you view digital identity practices.
Currently, UIDAI neither supports nor recommends private entities demanding Aadhaar for routine activities. Yet Aadhaar continues to function as a de facto identity document nearly everywhere—from checking in at hotels to entering private events. This widespread misuse is exactly what the new system aims to tackle.
UIDAI believes that by shifting to offline verification, people will no longer need to hand over photocopies of their Aadhaar—which often expose sensitive information that can be misused. With offline verification:
• Only registered businesses can request Aadhaar verification
• Individuals can share selective data as needed
• Privacy is improved, and identity theft risks are reduced
However, there is another side to this. With a UIDAI-approved method now available, more places might begin requesting Aadhaar verification—even for casual activities like restaurant entry. This could lead to situations where you scan a QR code simply to enter a premises. While some may find this secure and quick, others may see it as excessive or intrusive.
Additionally, even though you’re no longer leaving behind photocopies, an offline digital verification still creates a record. These logs may—legally or illegally—be accessible later, raising questions about oversight and Data Protection.
How to Use the New Aadhaar App: Step-By-Step Guide
Here’s a complete walkthrough for using Aadhaar offline verification with the new UIDAI app:
Step 1: Download the app
Search for the official “Aadhaar” app by UIDAI on Google Play Store or Apple App Store and install it.
Step 2: Choose your preferred language
Open the app and select your language to begin the registration process.
Step 3: Enter your Aadhaar number
Type in your 12-digit Aadhaar number exactly as printed on your card.
Step 4: Verify using OTP
UIDAI sends an OTP to your registered mobile number. Enter it to confirm access.
Step 5: Complete facial authentication
The app prompts you to scan your face in real time. The scan is matched with the photo stored in UIDAI’s database. This prevents unauthorized users from adding your Aadhaar to their device even if they know your Aadhaar number and OTP.
Step 6: Create a six-digit PIN
After successful face matching, set a six-digit PIN. This acts as the primary lock for your Aadhaar profile inside the app.
Step 7: Enable fingerprint or face unlock
You can activate biometric unlock for convenience. This doesn’t replace the registration face match; it only helps unlock the app once the PIN is set.
Step 8: Complete setup
Review permissions, finish setup, and access your digital Aadhaar. You can now share selective details or show the dynamic QR code during offline verification.
At the time of verification, simply open the app, display the QR code, or share your password-protected file. Service providers can only view the fields you choose to share.
For breaking news and live news updates, like us on Facebook or follow us on Twitter and Instagram. Read more on Latest Technology on thefoxdaily.com.


COMMENTS 0