
The Occultist is one of the challenging bosses in Castlevania Belmont’s Curse, testing both your platforming skills and ability to dodge dangerous attacks. However, defeating her is only half the challenge. Before reaching the boss arena, you must navigate several Library chambers, complete multiple planet-based platforming puzzles, and follow a specific route from the Forgotten Bridge section of the Clock Tower.
The battle becomes even more difficult because the Occultist can curse you with a number that determines how many hits you can survive. This mechanic makes avoiding damage essential, regardless of how much health you have remaining. Understanding her attack patterns and knowing when to move can make the encounter considerably more manageable.
This guide explains where to find the Occultist in Castlevania Belmont’s Curse, how to navigate the Library’s Observatory route, how to solve the planet platforming sections, and how to defeat the boss. You will also learn what rewards you receive after winning the fight.
Where to Find the Occultist in Castlevania Belmont’s Curse
The Occultist is located in the Observatory room inside the Library. Reaching her requires travelling east from the Forgotten Bridge section of the Clock Tower and progressing through several interconnected rooms.
The route includes ordinary chambers, elevated platforms, a checkpoint, and three planet-based platforming sections. Since the path involves multiple transitions, moving in the correct direction and following the required orb patterns is important.
Step 1: Travel east from the Forgotten Bridge
Begin at the Forgotten Bridge section of the Clock Tower. Head east across the bridge until you reach a door at the opposite end.
Go through the door to enter the Library. This is the starting point of the route that eventually leads to the Occultist’s boss arena.
Step 2: Pass through the Library chambers
Once inside the Library, enter the next chamber. You will see golden orbs floating above you. For now, you do not need to interact with them. Continue moving east and proceed through the next doorway.
You will arrive at an area called Rhetoric Shelves. Use your whip to reach the upper portion of the room, then leave through the door.
Keep heading right through the next chamber. Continue along the route until you reach a large room with a planet visible in the background.
Step 3: Activate the Mirror of Life checkpoint
In the large room with the planet in the background, look for the archer and take the door beyond it. This leads to a Mirror of Life.
Use the Mirror of Life to save your progress and replenish your resources before continuing. This is a useful stopping point because the route ahead includes several platforming challenges, and the Occultist encounter itself can punish mistakes.
Once you are ready, proceed through the next chamber to reach the first planet-based platforming puzzle.
How to Solve the Planet Platforming Puzzles
The Observatory route features three planet sections that require you to jump on floating orbs in specific patterns. Completing each pattern launches you towards the next set of platforms above.
Simply jumping randomly between the orbs may not be enough. You need to follow the intended sequence to create the required shapes and gain the boost that carries you higher.
First planet: Create a trapezoid
After leaving the Mirror of Life, enter the next chamber. You will see another planet with floating orbs positioned in front of it.
Your first objective is to rotate the planet by jumping on the orbs in the correct order.
- Identify the four orbs along the bottom row.
- Jump on these four orbs in sequence, moving from left to right.
- Complete the pattern to form a trapezoid.
- Move to the upper orbs and jump on them to receive a substantial boost.
- Use the boost to reach the next group of orbs above.
Continue climbing after completing the pattern. The goal is to reach the next area, where another planet platforming challenge awaits.
Second planet: Form a rhombus
The second planet section requires you to create a rhombus-shaped pattern. As with the first puzzle, the orbs must be activated through a specific sequence of jumps.
Look at the positions of the available orbs and follow the intended pattern to form the rhombus. Once you complete it, the platforming sequence launches you towards the next course above.
Keep your movements controlled while progressing between the orbs. The important objective is to complete the required shape rather than rushing through the section without following the pattern.
Third planet: Create a Z-like shape
Continue moving upwards until you encounter the third planet. This final platforming section requires a different arrangement.
Jump across the orbs to create a Z-like shape. Completing the pattern launches you upwards towards a gate.
Pass through the gate, continue through the next chamber, and you will finally arrive at the Occultist’s boss arena.
Before starting the fight, remember the location of the Mirror of Life along your route. The boss’s curse makes avoiding damage especially important, so entering the encounter prepared can help you handle the battle more effectively.
How to Defeat the Occultist in Castlevania Belmont’s Curse
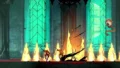
The Occultist has three main attacks, but her most dangerous ability is the curse she places on the player. This mechanic changes how you approach the fight because it limits the number of hits you can take before dying.
Instead of relying entirely on your remaining health, you must pay close attention to the curse and avoid unnecessary damage. Learning to recognise the boss’s attacks and reacting quickly to their warning signs is essential.
Understand the Occultist’s curse mechanic
During the fight, the Occultist curses you and assigns a number to your character. This number represents how many hits you can withstand before you die.
For example, if the curse displays the number eight, you will die after taking eight hits, regardless of your remaining HP.
This makes the fight less forgiving than it might initially appear. Even if you have plenty of health, you cannot afford to repeatedly absorb attacks while waiting for an opportunity to strike.
The best approach is to prioritise evasion. You may not be able to dodge or parry every attack perfectly, but you should avoid taking damage whenever possible and choose carefully when to risk a hit.
Occultist Boss Attack Patterns and How to Dodge Them
The Occultist primarily uses three attacks: Blood Spikes, Blood Wave, and Slab Drop. Each attack has a different warning or movement pattern, so recognising what the boss is preparing to do can help you react in time.
1. Blood Spikes
Blood Spikes causes spikes of blood to emerge from the ground. Before the spikes appear, you can see their silhouettes, giving you a brief opportunity to identify the dangerous areas.
How to dodge it: Watch the ground carefully and move away from the silhouettes before the spikes emerge. Avoid staying in one place for too long when the warning appears, and make sure your movement takes you away from the marked danger zone.
The key to this attack is observation. If you pay attention to the silhouettes rather than reacting after the spikes have appeared, you have a better chance of avoiding damage.
2. Blood Wave
The Blood Wave attack produces a wave from behind you. Remaining in your current position can leave you vulnerable, particularly if you fail to recognise where the attack is coming from.
How to dodge it: Run towards the opposite end of the arena when the wave appears. Creating distance and moving away from the incoming attack is the recommended response.
Keep an eye on your position as you move. Since the wave originates behind you, reacting quickly and committing to moving across the arena is more effective than hesitating in the danger zone.
3. Slab Drop
With Slab Drop, the Occultist summons a giant slab and slams it down towards you. The attack can be dangerous if you remain directly in its path.
How to dodge it: Sidestep to avoid the falling slab. Rather than staying underneath it or attempting to absorb the impact, move out of the attack’s path as soon as you recognise the threat.
Pay attention to the boss and your surroundings so you can respond before the slab lands.
How to Survive the Occultist’s Second Phase
The Occultist becomes more dangerous once her health drops below 50%. At this point, she begins mixing and matching her main attacks in a more punishing sequence.
Instead of dealing with each attack in isolation, you must remain alert as different hazards appear in quick succession. Blood Waves can force you to move across the arena, while Blood Spikes require you to watch the ground and react to their silhouettes. Slab Drop adds another threat that demands quick movement.
To survive this phase, focus on the following strategies:
- Keep moving: Avoid standing still for too long, particularly when the boss begins combining attacks.
- Watch the ground: Look for the silhouettes that signal incoming Blood Spikes.
- React to Blood Waves: Run towards the other end of the arena when a wave appears behind you.
- Sidestep falling slabs: Move out of the way when the Occultist prepares Slab Drop.
- Protect your remaining hits: Remember that the curse limits the number of hits you can take, so avoid trading damage unnecessarily.
The second phase is about survival as much as dealing damage. You need to keep hopping and repositioning while monitoring the different attacks. Trying to attack recklessly can leave you vulnerable to a combination of hazards.
Once this sequence ends, the Occultist will spawn again in a stunned state. This creates an opportunity to attack her and finish the fight. Take advantage of the opening rather than continuing to focus exclusively on evasion when the boss is vulnerable.
Rewards for Defeating the Occultist
Defeating the Occultist rewards you with the Occultist Tarot card, which grants the Blood Spike spell.
You will also unlock a dash spell that makes manoeuvring easier. This additional mobility can be useful as you continue exploring and dealing with the game’s other challenges.
The encounter therefore offers more than just progression past a difficult boss. The rewards provide new abilities that can expand your options as you continue your journey through Castlevania Belmont’s Curse.
Frequently Asked Questions
Where is the Occultist located in Castlevania Belmont’s Curse?
The Occultist is found in the Observatory room of the Library. To reach her, start at the Forgotten Bridge section of the Clock Tower, travel east, pass through the Library chambers, and complete three planet-based platforming puzzles.
How do you reach the Library’s Observatory?
Head east across the Forgotten Bridge and enter the Library. Continue through Rhetoric Shelves, pass the large room with the planet in the background, and reach the Mirror of Life. From there, complete the trapezoid, rhombus, and Z-like orb patterns to progress towards the Observatory.
How does the Occultist’s curse work?
The curse assigns a number that represents how many hits you can take before dying. For example, a displayed number of eight means you will die after taking eight hits, regardless of your remaining HP.
What are the Occultist’s main attacks?
The Occultist uses Blood Spikes, Blood Wave, and Slab Drop. Watch for the silhouettes that precede Blood Spikes, run to the opposite end of the arena to avoid Blood Wave, and sidestep Slab Drop.
What happens when the Occultist has less than 50% health?
Below 50% health, the Occultist combines her attacks into a more difficult sequence. Keep moving, watch for incoming hazards, and avoid taking unnecessary hits. After the sequence ends, she reappears stunned, giving you an opportunity to attack.
What rewards do you get for defeating the Occultist?
Defeating the Occultist grants the Occultist Tarot card, which provides the Blood Spike spell. You also unlock a dash spell that makes movement and manoeuvring easier.
Final Tips for Beating the Occultist
Finding the Occultist requires patience, particularly because the route to the Observatory involves multiple chambers and three planet platforming puzzles. Follow the required orb patterns carefully, use the Mirror of Life to save your progress, and make sure you understand the route before attempting the boss encounter.
During the battle, remember that the curse makes every hit count. Learn the warning signs for Blood Spikes, move across the arena to avoid Blood Wave, and sidestep Slab Drop. When the Occultist’s health falls below 50%, prioritise survival while she combines her attacks.
Once the difficult sequence ends and the boss becomes stunned, use the opening to deal damage and secure victory. With the Occultist defeated, you can claim the Blood Spike spell and dash spell before continuing your adventure in Castlevania Belmont’s Curse.
For breaking news and live news updates, like us on Facebook or follow us on Twitter and Instagram. Read more on Latest Esports on thefoxdaily.com.

COMMENTS 0