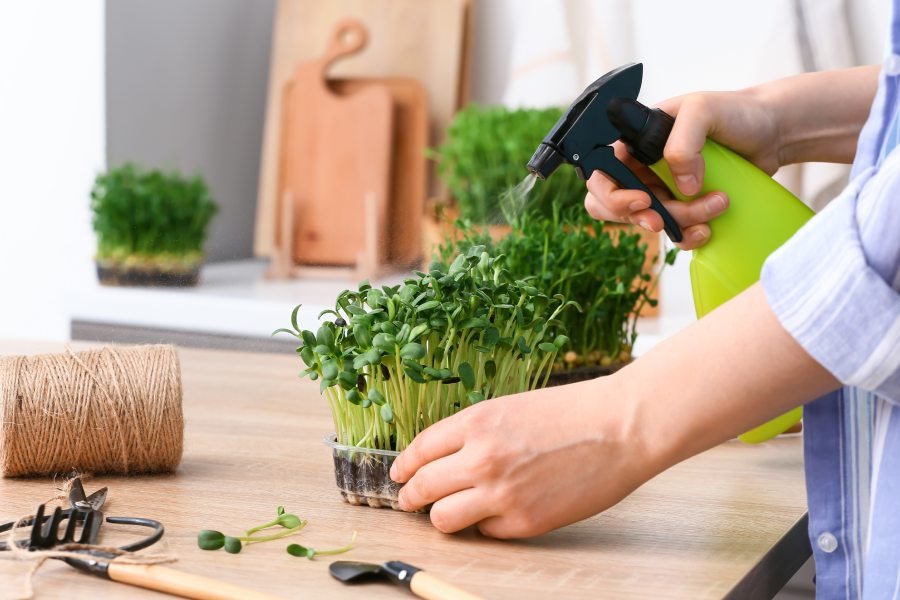
readers want to learn how to grow microgreens at home, which seeds are easiest for beginners, how to care for them indoors, and which common mistakes can cause mould, weak growth or failed harvests.
Primary keyword: growing microgreens at home
Related semantic keywords: best microgreen seeds, how to grow microgreens, radish microgreens, broccoli microgreens, methi microgreens, sunflower microgreens, microgreens for beginners, microgreen growing mistakes, indoor gardening, microgreen food safety
Introduction: Why microgreens are becoming a favourite for urban gardeners
You do not need a backyard, large balcony or elaborate gardening setup to grow something edible. In many homes, a shallow tray placed near a bright window can be enough to produce a crop of young greens in a relatively short period.
That is the appeal of growing microgreens at home. These are young plants harvested after germination and early leaf development, rather than being allowed to mature into full-sized vegetables. Radish, broccoli, mustard, sunflower, pea, beet, kale and several herbs can all be grown as microgreens.
For Indian home gardeners, familiar seeds such as methi can make the idea even more approachable. But there is an important catch: microgreens may be easy to grow, yet they are not completely foolproof. Too much water, poor ventilation, unsuitable seeds, inadequate light or unhygienic equipment can quickly turn a promising tray into a mouldy experiment.
The good news is that beginners can avoid most failures by choosing forgiving varieties, using clean food-safe materials and understanding one simple rule: microgreens need moisture, but they do not need to sit in water.
What exactly are microgreens?
Microgreens are young edible plants harvested while they are still small, generally around the stage when the first true leaves begin developing. They are different from sprouts, which are generally harvested much earlier and are often eaten with the seed and root attached.
This distinction is more than botanical terminology. Sprouts and microgreens have different growing methods and food-safety considerations. Microgreens are usually grown in a medium such as soil, coco coir or another suitable growing substrate, while sprouts are commonly germinated in water.
The young plants also pack plenty of flavour. Radish can taste peppery, mustard can be pungent, sunflower shoots can be nutty and methi can provide the familiar aromatic character associated with fenugreek.
Why grow microgreens instead of full-sized vegetables?
Traditional kitchen gardening can be enormously rewarding, but it requires patience. Tomatoes, chillies and many other crops need weeks or months before harvest.
Microgreens operate on a completely different timetable. Many varieties can be ready in roughly one to a few weeks, depending on the crop and growing conditions.
They also require little growing space. A shallow tray can produce a useful quantity of greens without needing a conventional garden bed.
There is a nutritional reason for their popularity too. Research and extension guidance indicate that microgreens can contain substantial concentrations of vitamins, minerals and other plant compounds, although nutritional content varies considerably by species and growing conditions.
That does not make microgreens a miracle food. Their real advantage is simpler: they can make it easier to add variety and fresh plant foods to meals.
Best microgreen seeds for beginners
Not every seed is equally beginner-friendly. Some germinate quickly and tolerate minor mistakes, while others are slower or require more careful handling.
1. Radish: one of the easiest places to start
Radish microgreens are a particularly practical first crop because they germinate relatively quickly and produce an unmistakable peppery flavour.
They are also visually satisfying. The stems can develop attractive pink or reddish tones depending on the variety, making the tray look more like a deliberate garden than an experiment conducted beside the kitchen sink.
For a first attempt, radish is a strong choice because quick germination provides beginners with rapid feedback. If something goes wrong, you are not waiting months to discover it.
2. Broccoli: compact, mild and versatile
Broccoli microgreens are another popular option. They belong to the cabbage family, which includes several microgreen crops that generally germinate and grow relatively quickly.
The flavour is considerably milder than mature broccoli, making the young greens easy to add to sandwiches, salads, wraps or cooked meals.
One important point, however, is that nutritional claims should not be oversimplified. Microgreens can be nutrient-dense, but the exact composition varies among species, varieties and growing conditions.
3. Methi: a familiar Indian kitchen seed
Methi microgreens can be an appealing choice for Indian gardeners because fenugreek is already familiar as a culinary ingredient.
The leaves have the characteristic aroma associated with methi, while the young shoots are tender enough to use in salads, sandwiches, wraps or as a garnish.
Before planting grocery-store seeds, however, check that they are untreated and suitable for growing for food. Seed treatment is an important consideration because microgreens are harvested very young and the seed coat can remain attached to the plant during growth.
4. Sunflower: bigger seeds, substantial shoots
Sunflower microgreens are popular because their larger seeds produce sturdy shoots with a pleasant, slightly nutty character.
Large seeds such as sunflower and pea can benefit from soaking before sowing, and some growing guidance recommends using weight during germination to keep larger seeds in good contact with the growing medium.
Sunflower also demonstrates why microgreens should not all be treated identically. Different seeds have different sizes, germination speeds and watering requirements.
5. Mustard: for gardeners who like stronger flavours
Mustard is another fast-growing member of the cabbage family. Its young leaves can have a distinctly spicy flavour, so it works particularly well when used in small quantities rather than as the entire bulk of a salad.
It is also useful for beginners who want to experiment with flavour differences between varieties.
6. Pea shoots: a different texture
Pea shoots provide a more substantial texture than many fine-stemmed microgreens. Like sunflower seeds, pea seeds are relatively large and may benefit from pre-soaking before sowing.
They are a good option once a beginner has mastered basic moisture control.
Best beginner seeds at a glance
| Seed | Flavour | Beginner appeal | Useful tip |
|---|---|---|---|
| Radish | Peppery and fresh | High | Good first crop for quick feedback |
| Broccoli | Mild and fresh | High | Suitable for salads and sandwiches |
| Methi | Aromatic and distinctive | High | Use untreated seeds intended for food growing |
| Mustard | Spicy | High | Useful for adding flavour to meals |
| Sunflower | Nutty and substantial | Moderate | Large seeds may benefit from soaking |
| Pea | Fresh and mildly sweet | Moderate | Soaking can help with large seeds |
How to grow microgreens at home
Step 1: Choose the right seeds
Seed selection is the first major safety decision.
Look for high-quality, untreated seeds from a reputable source. Seeds sold specifically for microgreens or sprouts can be a practical choice because they are intended for this type of production. Avoid seeds treated with fungicides or insecticides unless the product is explicitly appropriate for edible microgreen production.
Step 2: Pick a shallow, clean container
Microgreens do not need a deep pot. Shallow trays are generally more convenient because the plants are harvested young. Food-safe containers can also be repurposed, provided they are clean and suitable for food use.
Drainage is important. A container that allows excess water to escape is much easier to manage than one that turns into a miniature pond.
Step 3: Use an appropriate growing medium
Common options include seed-starting mixes, peat-based media, coconut coir and specialised growing mats. The medium should hold moisture without remaining waterlogged.
For beginners, consistency matters more than chasing an expensive setup.
Step 4: Sow evenly
Microgreen seeds are normally sown much more densely than seeds intended to mature into full-sized plants. Since the crop will be harvested young, there is no need to thin the seedlings in the same way you would for mature vegetables.
However, dense does not mean piled on top of one another. Uneven sowing can produce crowded patches beside empty areas, making watering and airflow more difficult.
Step 5: Keep the seeds moist during germination
During germination, seeds need consistent moisture. Gentle misting can help prevent seeds from being displaced.
Once seedlings emerge, bottom watering can be useful because it reduces the need to repeatedly wet the foliage. The growing medium should remain moist, not saturated.
Step 6: Give them enough light
After germination, microgreens need adequate light for healthy growth. A bright windowsill may work, while a grow light can provide more consistent conditions when natural light is inadequate.
Light intensity and temperature can vary significantly inside homes, so watch the plants rather than relying entirely on a fixed timetable.
Step 7: Harvest at the right stage
Microgreens are generally harvested while young, often when the first true leaves begin to develop. Clean scissors or a knife should be used, and hands and harvesting equipment should be clean.
Seven common mistakes that ruin a microgreen tray
1. Overwatering
This is probably the classic beginner mistake.
New gardeners often assume that more water means faster growth. In reality, constantly saturated growing media can encourage root problems and conditions associated with damping-off.
Better approach: aim for evenly moist media and make sure excess water can drain.
2. Using untreated-looking but unsuitable seeds
A packet of ordinary garden seed is not automatically appropriate for producing food that will be eaten as a young plant. Some seeds are treated with pesticides or fungicides.
Better approach: choose untreated seeds specifically suitable for edible microgreens or food production.
3. Ignoring airflow
A warm, humid and stagnant environment can create conditions that favour mould and other problems.
Better approach: provide reasonable ventilation without allowing the growing medium to dry out.
4. Sowing too densely
Microgreens are supposed to be dense, but excessive crowding can make it difficult for air to circulate and moisture to evaporate.
Better approach: follow the seed supplier’s recommended density and aim for an even layer.
5. Growing every variety in one tray
A colourful mixed tray may look attractive on social media, but combining seeds with dramatically different germination and growth rates can make management difficult.
Extension guidance specifically notes that different species can vary in germination and growth, making carefully matched mixes more practical than random combinations.
Better approach: grow one variety at a time when learning. Experiment with mixes later.
6. Harvesting too late
The goal is not to grow miniature versions of full-sized vegetables. Once the plants mature beyond the preferred microgreen stage, their texture and flavour can change.
Better approach: harvest according to the variety’s recommended stage rather than waiting for a large plant.
7. Forgetting food hygiene
Because microgreens are commonly eaten raw, cleanliness deserves as much attention as gardening technique. Wash hands before planting and harvesting, sanitise reusable containers and tools, use a clean water source and keep harvested greens away from raw meat and other potential sources of cross-contamination.
Fresh microgreens are also perishable. They should be refrigerated appropriately after harvest rather than left at room temperature for extended periods.
Microgreens are not sprouts — and that distinction matters
One of the most important facts often missing from beginner gardening guides is the difference between sprouts and microgreens.
Sprouts are harvested extremely early and are commonly consumed whole. Microgreens are allowed to develop further and are usually harvested above the growing medium. Because the production methods differ, their food-safety considerations differ too.
That does not mean home-grown microgreens are risk-free. They are still raw produce. Clean seeds, clean equipment, safe water, good hygiene and proper storage remain important.
Do microgreens need fertiliser?
Usually, beginners do not need to make fertiliser the centre of their setup.
Seeds contain stored nutrients that support the young plant through its early development. Some simple microgreen systems can therefore produce a crop without conventional fertilisation.
Adding unnecessary fertiliser can actually complicate a beginner’s setup. If the goal is a short crop cycle, focus first on good seed, moisture, light, airflow and sanitation.
Sunlight or grow light: which is better?
There is no universal winner.
A bright window can be sufficient in many homes, particularly when the microgreens receive adequate light. A grow light becomes useful when natural light is weak, inconsistent or unavailable.
The key is to avoid assuming that every indoor location has the same light conditions. A tray that looks healthy on one windowsill may become pale and stretched on another.
A smarter beginner strategy: grow several small trays, not one giant tray
One of the best ways to improve the home-growing experience is to stop thinking of microgreens as a single crop.
Instead, sow small batches at intervals. For example, start with radish, follow with broccoli and then try sunflower or methi. This gives you an opportunity to learn how different seeds behave without risking an entire supply on one experiment.
It also creates a more continuous harvest.
This approach has another advantage: failure becomes useful information. If one tray develops mould, you can investigate what happened without losing every crop at once.
What not to grow as microgreens
Beginners should not assume that every edible mature vegetable is safe to harvest as a microgreen.
Some plants, including tomato, pepper, eggplant and potato, are specifically unsuitable for microgreen production because their young tissues can contain alkaloids that are potentially toxic. Wild plants should also not be used unless the species is positively identified and known to be suitable.
When experimenting, stick with well-established edible microgreen species rather than turning the seed drawer into a botanical guessing game.
The biggest misconception about microgreens
Microgreens are sometimes marketed as though they are automatically healthier simply because they are tiny.
That is too simplistic.
The nutritional profile varies by species, variety and growing conditions. Microgreens can provide useful nutrients and plant compounds, but they are best considered one component of a varied diet rather than a replacement for mature vegetables.
The real advantage may be behavioural: a small tray growing on a kitchen windowsill can make fresh greens visible, accessible and convenient.
Microgreens vs a traditional home vegetable garden
| Feature | Microgreens | Traditional vegetables |
|---|---|---|
| Space required | Very small | Usually more space |
| Harvest time | Often relatively short | Usually longer |
| Container depth | Shallow trays work well | Varies by crop |
| Beginner feedback | Fast | Often slower |
| Crop variety | Many vegetables and herbs | Very broad |
| Best advantage | Quick fresh greens in limited space | Full-sized produce and longer-term gardening |
How to turn a microgreen hobby into a sustainable routine
The easiest way to make home microgreens successful is to keep the system boring.
Use the same clean trays, the same growing medium, a small selection of reliable seeds and a consistent watering routine. Change only one variable at a time when experimenting.
This is essentially the gardening equivalent of troubleshooting. If one tray fails after you change the seed, container, light and watering method simultaneously, you will have no idea which variable caused the problem.
Keep a simple record of the sowing date, variety, watering pattern and harvest date. After several cycles, your own results can become more useful than generic instructions because your home has its own temperature, humidity and light conditions.
Final takeaway: Start small, keep it clean and choose forgiving seeds
Growing microgreens at home does not require a sophisticated urban farm. A clean shallow tray, appropriate growing medium, untreated food-safe seeds, water and adequate light can be enough to begin.
For first-time growers, radish, broccoli, mustard and methi are practical varieties to explore, while sunflower and pea can add a different texture and flavour. The most important step is not choosing the fanciest seed. It is choosing appropriate seed and giving it the right conditions.
And if there is one lesson worth remembering, it is this: microgreens fail more often from too much enthusiasm than too little. Too much water, too many seeds, too little airflow and too much interference can do more damage than simply letting the plants grow.
Start with one or two trays. Keep them clean. Watch the moisture. Give them adequate light. Harvest young. Once you can consistently produce a healthy tray, expand your collection.
For urban gardeners, that is perhaps the biggest attraction of microgreens: you do not need to wait for the perfect garden. You can start with a few seeds and a small corner of your home.
For breaking news and live news updates, like us on Facebook or follow us on Twitter and Instagram. Read more on Latest Lifestyle on thefoxdaily.com.

COMMENTS 0